
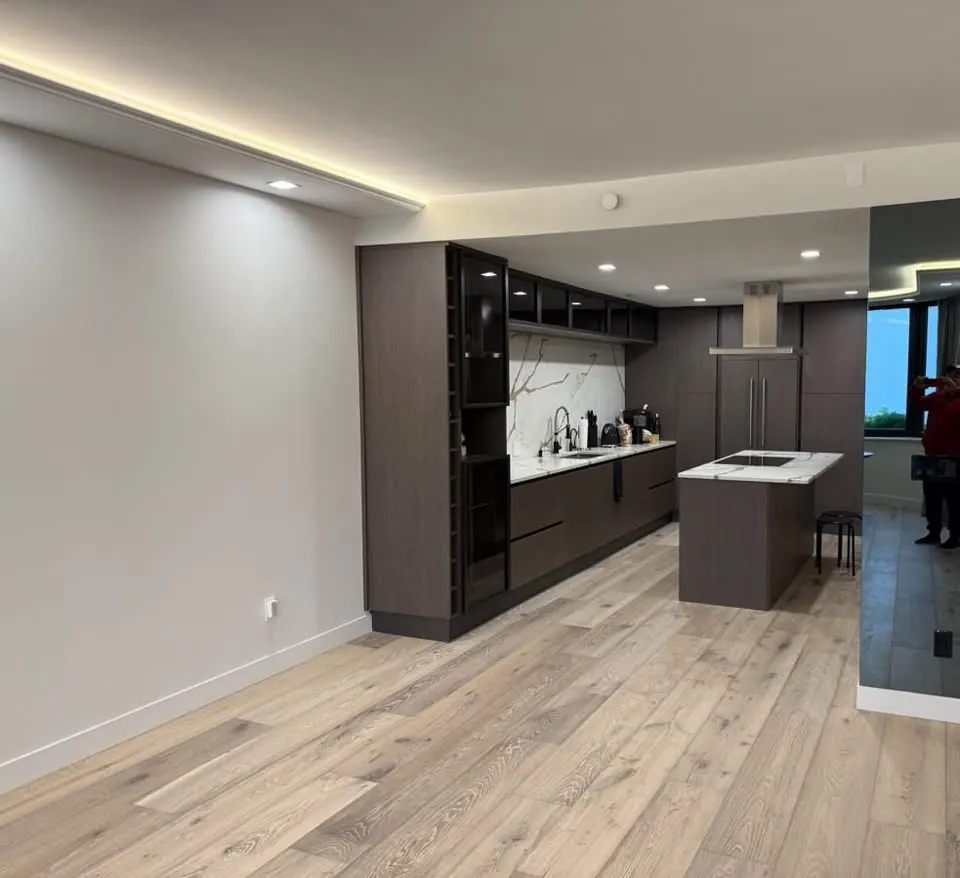
Thirty years of wet basements taught us patience. Kitchens teach a different kind: the layout has to be right before anyone swings a hammer, or you will pay twice. Bergen County kitchens — especially in 1950s–1970s split-levels and colonials common in towns like Paramus, Dumont, Teaneck, and Ridgewood — were often built for a different era of cooking, appliances, and how families use the room. Updating them well is less about the prettiest door style and more about sequence, structure, and honest trade-offs.
This guide is what a kitchen renovation here really takes: decisions, timeline, cost drivers, and the mistakes that turn a project into a second project. It supports the service overview at kitchen renovation.
Start with the house you have, not the one on social media
Kitchens of that era share a few realities:
- Tight footprints on split-levels, where removing a wall is a structural question, not a weekend mood
- Aging electrical panels and limited circuits for modern loads (ranges, microwaves, islands, under-cabinet lighting)
- Plumbing stacks and exterior walls that make “just move the sink three feet” expensive
- Families living in place — phased work, dust control, and temporary cooking plans matter as much as finishes
A good renovation respects those constraints and still delivers a room that feels open, bright, and usable every morning. A bad one chases an open-concept photo without checking what the joists and wires are doing.
The decisions that actually drive cost and stress
1. Cosmetic refresh vs. layout / systems change
Cosmetic like-for-like — doors, paint, counters, similar appliances in the same spots, no moving sinks or ranges — is usually a lighter path (confirm your town). Timeline and budget stay more predictable.
Layout or systems change — moving plumbing, gas, electrical, or structure — is a different project. Design locks first. Permits and rough inspections enter the picture. Change orders explode when people “figure it out after demo.”
2. Stock vs. semi-custom vs. custom cabinets
Cabinets usually dominate both budget and lead time. Custom and semi-custom can mean weeks of manufacturing before install can start. Stock is faster but less flexible on odd wall lengths in those homes. Neither is “better” in the abstract; the lead time has to sit on the calendar before you pick a countertop template date.
3. Island and open walls
Islands and dropped walls sell dreams. Structure, electrical, and plumbing routes sell reality. Bearing walls need design before demo — not a surprise after the dust settles.
4. Ventilation that actually works
A range hood should be sized for the cooking equipment and ducted to the exterior. Recirculating-only solutions in a closed-up Northeast house leave grease and humidity in the cabinets and paint. Hoods unducted into attics or undersized for the range are a common “why does this kitchen still feel greasy?” answer six months later.
5. Lighting in layers
Task light at the counters, ambient in the room, maybe under-cabinet fills. One can light in the middle of the ceiling made sense in 1965. It does not serve a modern work triangle.
The sequence that protects you (lock this before demo)
- Layout and selections — cabinet plan, appliances, rough locations
- Permits when systems change — building / electrical / plumbing as required by Authority Having Jurisdiction (AHJ — your local building department)
- Demo with protection of adjacent rooms (split-levels share air and dust)
- Rough plumbing, electrical, gas, HVAC — pass rough inspection before close-up
- Drywall, paint, flooring (order depends on floor type and wall conditions)
- Cabinets set level and plumb
- Countertop template after cabinets are set — not before
- Backsplash, fixtures, GFCI, lighting
- Appliances, caulk, final inspection when required
Myth to retire: “We’ll figure the layout after we open it.” Rough-in and cabinet plans need to lock first. Myth to retire: “Counters before cabinets.” Stone reveals every error; template after the boxes are dead level.
Week-by-week live-in survival guide
Most Bergen families stay in the house. The calendar below is a teaching sketch, not a promise — cabinet lead times and discovery stretch it — but it is how you plan sanity, not only finishes.
| Phase | What is usually happening | How to live through it |
|---|---|---|
| Week 0 (before demo) | Final layout sign-off, appliance orders, temporary kitchen setup | Stage a coffee + microwave + toaster + mini-fridge or relocated fridge zone away from the work path. Confirm where trash, school lunches, and pet food live. Photograph the existing kitchen for appliance dimensions. |
| Week 1 — Demo & open | Cabinets out, floors/walls open, dust peaks | Expect the worst dust week. Plastic and zip walls on stairs in split-levels. Run HVAC filters hard or isolate returns if the contractor recommends it. Eat simple: no-cook and one-pot meals. Park cars clear of dumpster and material trucks. |
| Week 2 — Rough-in | Plumbing, electrical, gas, hood duct, inspections | Noise and trade traffic. Keep kids/pets out of the zone. Do not “just move that pipe a little” verbally without a written change. Temporary sink may be offline — plan dish tubs or disposable ware. |
| Week 3 — Close-in & prep | Drywall, paint starts, flooring as sequenced | Dust calms relative to demo but grit remains. Good week to confirm appliance delivery dates against cabinet install — ranges and fridges that arrive early need a protected path and a place to sit. |
| Week 4–5 — Cabinets | Boxes set level; delays if product was late | Protect finished floors. Walk every door and drawer for swing conflicts before counters are templated. Living on temporary cooking continues. |
| Week 5–7 — Counters & finish | Template → fabricate → install; backsplash; fixtures | Stone lead time is its own clock after template. Hood, sink, and dishwasher connect late. Plan a real first cooking day only after gas/electric finals and GFCI checks. |
| Ongoing realities | Appliance delivery, punch list, final clean | Measure stair turns and door widths before the truck arrives. Split-level landings punish oversized fridge crates. Keep a punch list in writing; “we’ll come back someday” is not a close-out. |
Temporary cooking that works: induction hot plate or microwave, slow cooker, outdoor grill when weather allows, disposable plates for peak demo week, and one clear counter-height surface that is not in the dust plume. Dust control: sealed work zone, sticky mats at stairs, nightly vacuum of the path you still use, and honesty that split-levels share air — “we closed the kitchen door” is not enough by itself.
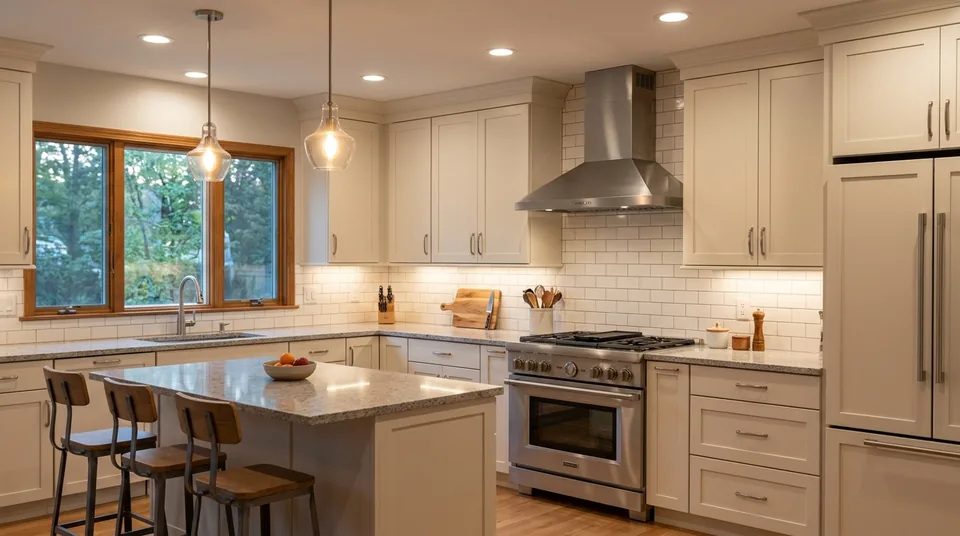
Layout mistakes that cost the most
These are the expensive regrets in mid-century Bergen kitchens — especially compact split-level galleys — not the wrong hardware finish.
Moving the sink “just a little”
Three feet left on a mood board can mean new drain lines, opened ceilings below, vent stack fights, and a week of plumbing you did not budget. Exterior-wall sinks with windows look charming and constrain rough-in. Mentor rule: move the sink only when daily life is broken, not when a photo wants symmetry. Same-footprint with better cabinets and light is often the smarter spend.
Island that blocks traffic
Islands need working clearances on the sides you actually use — dishwasher door, refrigerator swing, oven door, and the path from fridge to range. In a short split-level kitchen, an island can turn into a peninsula of frustration: two people cannot pass, the dishwasher door becomes a barricade, and the “seating side” faces a wall of chaos. Measure open-door clearances. If the footprint is tight, a peninsula or better galley often beats a forced island.
Forgetting appliance door swings
Plans show boxes closed. Life opens them. Fridge doors that hit walls, wall ovens that need landing space, dishwashers that cannot open if a person stands at the sink — these are daily taxes. Draw the swing arcs. Stand in the empty room with painter’s tape on the floor. If two doors cannot open at once in a two-cook household, redesign now.
Other high-cost layout traps
- Opening a bearing wall for “open concept” without engineering — headers, posts, and finish repair on the dining side are part of the project
- Range on an island without a real duct path for an exterior-vented hood
- Refrigerator in a dead corner with no door clearance or water line plan
- Cabinets to the ceiling ordered before you measure bulkheads, beams, and out-of- square walls
Cheap changes happen on paper. Expensive changes happen after rough-in and cabinet order.
What it costs (ranges, always site-specific)
Broad U.S. pattern ranges (~2026) — always qualified by your house and selections:
- Cosmetic refresh: a typical package sits in the mid four figures to about $15k
- Mid-range full remodel: commonly lands around $40k–$75k+
- Full gut / higher detail: most full guts land about $60k–$120k+
What moves the number: moving sinks or gas, electrical panel capacity, structural openings, cabinet tier and lead, stone counters, appliance package, and working in an occupied home. Simple refreshes can measure in weeks; full remodels commonly run 1–3+ months including design and lead times. Cabinet manufacturing alone can take 4–6+ weeks before install starts.
Bergen Restoration works from a walk-through and a written scope — not a phone number that pretends every split-level galley is the same job. When you compare numbers, ask what is fixed price versus allowance, and whether temporary kitchen protection and final cleaning are inside the figure you are holding.
Permits — confirm the town, not a rumor
Requirements vary by municipality and by scope. Cosmetic same-layout work without wiring, plumbing, gas, or structure changes is often lighter — confirm AHJ. Moving sinks, new circuits, gas lines, or walls is multi-subcode work in most places. Gas ranges and cooktops are licensed-trade territory. Do not invent a single “Bergen kitchen permit rule.” Confirm the building department for the job address.
Living through the project
If you are staying in the house (most Bergen families are), plan temporary cooking, protect stairs and shared HVAC paths, and accept that older walls hide surprises — old wiring, plumbing quirks, out-of-level floors. A good contractor budgets contingency language for discovery without treating every surprise as an open checkbook. A good homeowner decides layout before demo so discovery does not become redesign.
In split-levels common across Paramus, Teaneck, Dumont, and Ridgewood, dust and noise travel through open stairs. Protect finished lower levels and plan appliance delivery through real door widths — not the path that only exists on a floor plan. Older cores in towns like Hackensack or Englewood may add different quirks (tighter access, older service panels). Western and northern stock in places like Mahwah often has larger footprints but the same rule: layout and rough-in before finishes.
Electrical and plumbing realities (without scaring you)
Modern kitchens pull real load: range, microwave, dishwasher, disposal, island outlets, lighting. Under-fed circuits and missing GFCI/AFCI protection show up at inspection — or worse, as nuisance trips after move-in. Plumbing moves are not “just a little more copper”; drain pitch and venting have to work when the sink lands three feet left of where 1968 put it. Gas lines are licensed-trade work in most jurisdictions. None of this means every kitchen needs a panel upgrade. It means the walk-through should name what the existing service can support before you order a double oven and an induction cooktop on hope.
Red flags when comparing bids
Blunt list — walk away or renegotiate when you see these:
- No locked cabinet plan before demo — you are funding redesign by the hour
- No exterior-ducted hood in a full cooking remodel — you are buying a greasy paint job six months out
- “Like-for-like never needs a permit” stated as absolute law — towns and scopes differ; absolute talk is lazy or reckless
- Counters scheduled before cabinets are set — stone will record every error
- A price that only works if the panel, joists, and gas line cooperate perfectly — mid-century houses do not do perfect
- No contingency language for discovery — “we never have surprises” is marketing
- Lowest bid with no rough-in or inspection path when systems move
- Verbal “we’ll take care of it” with nothing in the written scope
Here’s how people get burned (teaching pattern, not a case study)
A household picks the lowest bid because it is “almost the same” as a higher one. The cheap number assumed same-spot plumbing, no panel work, and a recirculating hood. After demo, the old drain cannot move without opening the ceiling, the range needs a new circuit, and the “included” hood was never ducted outside. Each item becomes a change order. The final invoice lands near the higher bid they rejected — plus weeks of delay, plus a family still living on a hot plate. They did not get a bargain. They got a low opening bid and paid retail for reality later.
The protection is boring: written scope, exterior hood called out, electrical capacity named, plumbing moves priced, contingency process defined. If a bid cannot survive those sentences, it is not cheaper. It is incomplete.
A simple selection order (so lead times do not stack against you)
- Layout and appliance models (openings, fuel type, electrical needs)
- Cabinet plan and door style (starts the long lead)
- Counter material (template only after cabinets)
- Backsplash, hardware, lighting (can trail slightly without blocking rough-in)
- Paint colors last if you want options after light hits the new room
That order keeps the critical path honest. Reversing it is how people wait eight weeks for cabinets, then another three for stone, then discover the hood duct was never planned.
Galley, L-shape, and the open wall — layouts that fit real houses
Galley kitchens in older homes can work brilliantly with better light, continuous counters, and storage to the ceiling. They fail when every appliance door fights a narrow aisle. Measure open-door clearances, not just closed boxes on a plan.
L-shapes and U-shapes buy counter continuity and corner storage — lazy susans and diagonal corner units are practical, not old-fashioned, when the alternative is a black hole cabinet. Islands need circulation on all working sides; a pretty island that blocks the dishwasher door is a daily annoyance. Peninsula designs sometimes deliver seating without the full island traffic problem on tight split-level footprints.
Opening to the dining or living room can transform light and family life. It can also remove a bearing wall, relocate ducts, and change how sound and cooking smells move through the house. Budget engineering and finish patching on the far side of any removed wall — the “other room” is part of the project.
Appliances: openings, fuel, and the panel conversation
Lock appliance models early enough to fix:
- Width, height, and depth openings
- Fuel type (gas, electric, dual-fuel, induction)
- Circuit and receptacle needs
- Hood CFM and duct diameter
- Water and drain for refrigerators and dishwashers
- Delivery path through real doors and stairs
Induction and high-BTU ranges change electrical and ventilation needs. Double ovens and warming drawers add load. A walk-through that ignores the panel is guessing. None of this means every kitchen needs a service upgrade — it means the existing service should be named before the appliance package is sacred.
Counters, backsplash, and the template trap
Stone and solid surface want cabinets set, level, and permanent before template. Seam placement, sink reveals, and cooktop cutouts are measured from reality, not from a hopeful drawing. Backsplash can follow counters; full-height slab backsplashes need extra planning for outlets and windows.
Butcher block and laminate have different care and heat rules. Choose for how you cook, not only for the photo. Northeast sun through a sink window can fade and heat some surfaces — ask about orientation when you pick colors.
Flooring under a kitchen remodel
Flooring sequence depends on product. Some floors run under cabinets; some stop at the toe-kick line with careful transitions. Height changes at hallways matter on older floors that are already out of level. Waterproof or water-resistant products in the kitchen still need honest install at dishwasher and sink edges. Do not assume the old floor can hide under new cabinets without checking height and condition.
Living through a kitchen remodel (practical mentor list)
- Set up a temporary coffee/microwave station away from dust
- Protect stairs and finished lower levels in split-levels
- Plan trash and recycling when the sink is offline
- Confirm pet and kid safety around open walls and tools
- Expect noise during demo and rough-in; plan work-from-home days accordingly
- Keep one working fridge path if possible
A family that stays put needs more protection labor — that shows up in price and is worth it compared with living in grit for a month.
Change orders: which ones are fair
Fair discovery: rot behind a sink, illegal prior wiring, out-of-level floors that prevent stone install, hidden plumbing that cannot move as drawn without opening more ceiling. Fair owner changes: “We decided to add a pot filler after cabinets were ordered” — that is a choice, not a contractor failure. Good contracts explain how each type is priced. Bad projects blur them.
What change orders actually look like in real kitchens
Mid-century Bergen kitchens produce a familiar discovery set. None of these is a moral failure if the contract expected them; all of them hurt if the bid pretended the walls were empty.
| Discovery / change | What you often find | Why it costs |
|---|---|---|
| Rot or soft framing at the sink | Decades of slow drip under a window sink | Sister joists or sister studs, dry, treat, re-frame before cabinets |
| Plumbing that will not “just stretch” | Cast iron / mixed eras, vent in the wrong place, trap arm too long for the new sink spot | Open more wall or ceiling; re-pitch; sometimes leave the sink closer to the stack |
| Illegal or under-fed electrical | Two-wire circuits, shared neutrals, no capacity for island/microwave/disposal | New circuits, panel space, GFCI/AFCI as required — not a $40 outlet swap |
| Out-of-level floors and walls | 1960s settle; cabinets need shims; stone will not hide it | Leveling, scribe, or floor work before template |
| Gas line too small or poorly routed | Range upgrade or island gas | Licensed gas work, pressure test, possible meter conversation |
| Hood duct never existed | Recirc “hood” and a cabinet full of grease | Cut exterior, damper, fire-safe duct path, makeup-air thinking on big CFM |
| Owner change after order | Different island size, added pot filler, appliance model swap | Factory change fees, re-rough, schedule slip — priced as a choice |
A clean change order states what, why (discovery vs owner), cost, and schedule impact in writing. “Extra as discussed” is how both sides end up sure they are right.
Maintenance and care after the reveal
- Clean and maintain the hood filters; grease is progressive
- Reseal stone if your material requires it
- Watch caulk at sinks and backsplashes
- Keep cabinet finish care mild — harsh cleaners age doors fast
- Leave a packet of touch-up materials and paint codes in a kitchen drawer
A kitchen that is maintained looks “new” longer than one that is only photographed once.
How kitchen work connects to the rest of the house
If you are also planning a room addition or bump-out for more kitchen space, design the addition and the remodel as one story — structure, rooflines, and plumbing stacks do not care that your budget is split across two contracts. If windows over the sink are failing, coordinate with window replacement so flashings and trim are not redone twice. Dust from kitchen demo will find a freshly finished hall bath if containment is weak — sequence matters when multiple rooms are in flight.
A sample decision path for a Bergen split-level galley
- Photograph how you cook for a week — where clutter lands, where two people collide
- Decide same footprint vs open wall with a structural check before emotional demo
- Lock range and refrigerator models for openings and fuel
- Choose cabinet tier knowing lead time is part of schedule, not a surprise
- Size an exterior-ducted hood to the cooking equipment
- Have the electrical service reality named before appliance upgrade fantasies harden
- Set a temporary kitchen plan for the offline weeks
- Template counters only after cabinets are set and signed off as level
- Walk the finished room with the hood on and every door open — aisles and conflict points show up immediately
That sequence keeps money on structure, air, and layout — the parts you live with longer than any hardware trend. When budget is tight, protect those lines first and let decorative upgrades wait for a second phase rather than starving the hood duct or the electrical rough that makes the room safe and pleasant day after day.