
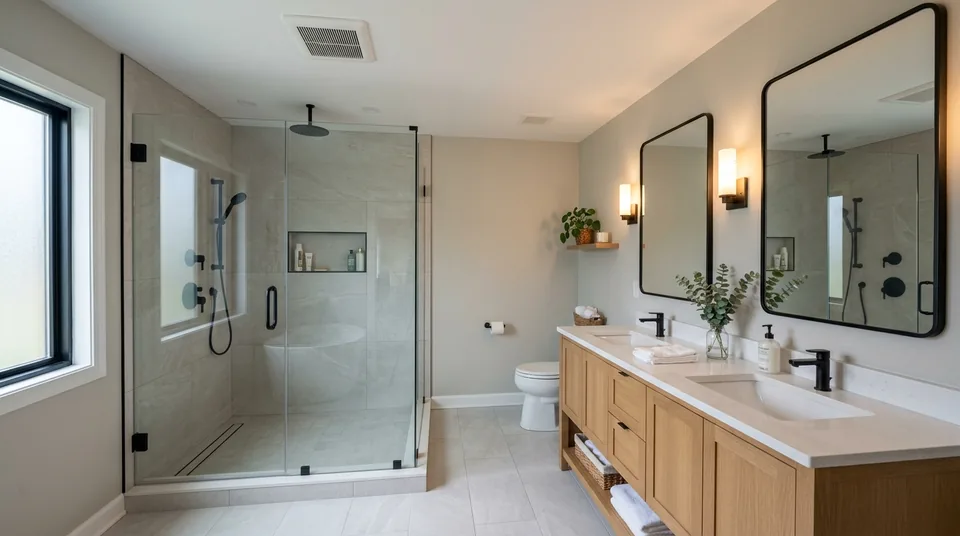
There is a clean satisfaction in a walk-in shower that just works: water runs to the drain, glass stays clear enough to enjoy, niches stay dry behind the tile, and the room feels larger than its footprint. That feeling is craft — pre-slope, continuous waterproofing, flood-test, then tile and glass — not a catalog door hung on hope.
This article is about installing a walk-in shower well. For whole-bath context see bathroom renovation. For converting a tub footprint see tub-to-shower. Accessibility-first planning: aging-in-place bathroom.
Hub: walk-in shower installation.
What “walk-in” actually means
A walk-in is a shower with easy entry — low curb or curbless — and usually a glass panel or door instead of a tub wall. It can sit in a former tub alcove or a purpose- built wet room corner. The visual is open; the engineering is a pan that never lets water into the structure.
Pan systems (choose on purpose)
Walk-in pans fall into three owner-facing buckets. Under the tile you may still see mud beds, foam trays, or bonded waterproof systems — but the decision most households make is acrylic vs custom tile vs hybrid. Pick one strategy and execute it completely. Hybrid accidents (two systems butted without a designed joint) are where leaks hide.
Comparison: acrylic vs custom tile vs hybrid
| Acrylic / system base | Custom tile pan | Hybrid (e.g. acrylic base + tiled walls, or foam pan + tile) | |
|---|---|---|---|
| What it is | Molded base (often with matched wall panels or tile-ready walls) | Built pan (mud bed / foam / bonded system) with continuous waterproofing, then tile floor and walls | Designed mix: factory geometry on the floor, custom look on the walls — or reverse, only when details are engineered as one wet assembly |
| Speed (real-world) | Fastest path; many Bergen hall-bath swaps finish in a few days once rough work is done | Slowest; flood-test, thinset, grout cure, then glass measure | Mid: base sets quickly; tile walls still need wet-trade days |
| Cost band | Most jobs land in the low-to-mid thousands when plumbing stays put | Real-world installs typically sit mid thousands to low five figures with glass and labor | Between acrylic-only and full custom — glass and wall tile still move the number |
| Look | Clean, consistent; less “spa magazine” variety | Full design freedom: large-format porcelain, niches, benches, linear drains | Custom walls with a predictable floor; good compromise in compact alcoves |
| Durability / craft | Excellent when set level and supported per instructions; surface can scratch if abused | Excellent when membrane + slope + flood-test are right; failures are assembly failures, not “tile failed” | Durable only if seams, height transitions, and membrane strategy are one system — not two products kissing at a caulk line |
| Bergen bath fit | Wins in compact 1950s–70s alcoves when the footprint matches a standard base and the household wants the bath back online | Wins when the alcove is odd, out-of-square, or the design needs curbless / linear drain / exact tile story | Wins when you want tile drama on walls but less risk/time on the floor plane |
| Watch-outs | Wrong base size forced into a bad footprint; panels over unknown wet framing | Skipping flood-test; flat floors; mixed membrane brands | “Hybrid” sold as two unrelated products with no joint detail |
Mud bed, foam trays, and bonded systems (under the tile)
- Mud bed / mortar pan with liner: traditional, flexible for odd layouts. Needs correct pre-slope so weep holes work, liner height up the walls, careful curb detail. Skill- and time-intensive.
- Foam / prefabricated waterproof pans: faster geometry when the product fits. Manufacturer-matched thinset, seams, and drains — mixing brands casually voids the logic of the warranty.
- Acrylic bases: predictable shape and speed; must be set level and fully supported.
Craft rule: the pan is not the tile. Choose the wet assembly first; finishes second.
Slope: water has to want the drain
Residential shower floors are often discussed around about 1/4" per foot toward the drain — confirm for your assembly and product. Flat “looks modern” floors that puddle are failures, not aesthetics. Linear drains change layout and pitch design; they do not remove the need for slope.
Large-format floor tile makes flatness and pitch more demanding. Beauty and geometry have to negotiate before the wet saw starts.
Waterproofing is continuous — or it is theater
Waterproofing is a system: floor, up the walls (often well above splash height), corners, niches, curb, and penetrations. Sheet membranes and liquid-applied membranes both work when installed as designed. Thinset type must match the membrane manufacturer’s rules.
Never nail or screw through a pan liner below the curb top. That sentence prevents more callbacks than any fancy tile.
Flood-test day — what actually happens
A flood test is the unglamorous day that protects the expensive day (tile and glass).
Why it matters: once tile, grout, and glass are in, finding a leak means demolition. A pan that weeps into the ceiling below or the wall cavity is a five-figure problem wearing a pretty face. Flood-testing catches failed seams, unsealed corners, drain flange mistakes, and liner penetrations before the finish layer locks them in.
What a proper test looks like (craft sequence):
- Pan and waterproofing complete to the stage the system requires — drain connected as specified, no tile yet on the floor assembly being tested.
- Drain plugged (test plug or approved method) so water stays in the pan.
- Pan filled with standing water to the depth the manufacturer or trade practice calls for — often enough to stress the liner and drain flange, not a timid splash.
- Wait for the specified period (commonly on the order of hours, per system — not a five-minute glance).
- Inspect: water level drop, damp joist bays or ceiling below, wet spots at curb corners, and any weep where water should not be.
- Pass → proceed to backer/tile. Fail → open, fix, retest. No “it will seal when we tile.”
Tiling over an untested custom pan is gambling with the most expensive surface in the room. Acrylic bases still need correct set and sealing; custom pans need the flood test on the calendar, named in the scope.
Walls, niches, and benches
Niches are waterproofing details with a pretty face. Sills should pitch out; corners need preformed pieces or careful folds. Benches need structure and continuous membrane — a seat that collects water behind tile is a mold factory.
Cement or foam backer goes with the system, not “whatever was on sale.”
Glass: measure late, install carefully
Custom glass is measured after pans and walls are final — not from a hopeful drawing of out-of-square post-war baths. Channels and seals at curbs and walls are part of water control. Lead times for custom glass often shape the end of the schedule more than grout cure.
Glass & hardware choices that actually last
Humid Bergen County baths punish cheap chrome and soft finishes. Choose glass and metal as a system that will still look intentional in year five.
| Choice | Look | Craft / durability notes |
|---|---|---|
| Frameless | Lightest visual; “open spa” | Needs accurate openings, quality hinges/clamps, correct clearances. Out-of-square walls show. Measure after tile. |
| Semi-frameless | Clean with a slim channel or partial frame | More forgiving on slight out-of-plumb walls; good middle path in remodel alcoves |
| Framed | More traditional enclosure | Maximum forgiveness and splash control; heavier visual weight |
Hardware that survives humid NJ baths:
- Prefer solid brass or quality stainless hardware with finishes rated for wet areas (brushed nickel, matte black, chrome — matched to real wet-area product lines, not closet-door hardware painted silver)
- Avoid mystery soft coatings that peel and flash rust at screw holes
- Hinges and clamps need the glass thickness they were engineered for — mixing leftover hardware is how doors sag and leak at the strike
- Thresholds, bottom sweeps, and wall channels are water-control parts, not optional chrome trim
- Ask for finish warranties and care notes (hard water etching on glass is a squeegee habit problem as much as a product problem)
Fixed panels and half-walls reduce door-swing drama in tight Bergen baths; hinged doors need towel-clearance space. Anti-scald valve practice still matters — beautiful glass does not fix a scalding shower.
Ventilation (the unglamorous hero)
Even a perfect pan fails the home if steam has nowhere to go. Exhaust ducted to the exterior, with enough run-time after showers, protects grout, paint, and peace of mind. Attic-dumping fans are not a finish strategy.
Cost and time (site-specific)
Broad patterns (~2026):
- Acrylic / prefab-forward walk-ins: most jobs land in the low-to-mid thousands
- Custom tiled walk-ins with glass: real-world installs typically sit in the mid thousands to low five figures depending on size, tile, and glass
Duration: prefab-leaning jobs may run on the order of a few days; custom tile often about a week or more including flood-test and cure — glass can add wait time.
Drivers: pan type, drain relocation, substrate repair, tile labor, niches/benches, frameless glass, valve relocation.
Permits
Like-for-like pan work may be lighter; moving drains/valves or opening systems often needs plumbing review. Confirm Authority Having Jurisdiction (AHJ — your local building department). GFCI and exhaust rules apply when electrical changes. Do not invent town-wide always/never rules.
Install sequence (craft order)
- Demo / prep; confirm framing and drain location
- Drain and pre-slope or set prefab/acrylic pan
- Curb and continuous waterproofing
- Flood-test
- Backer and tile (or panels)
- Grout, seal, valve trim
- Glass / door
- Final water test and caulk at change-of-plane joints
Red flags
- No flood-test on custom pans
- “Tile is waterproof”
- Glass measured before walls exist
- Mixed membrane products without a system plan
- Lowest bid with no slope or membrane language