
There is a particular pleasure in stepping from cold Northeast air into clean heat — wood fragrance, quiet, a backyard that suddenly feels like a retreat. Outdoor saunas have moved from novelty to serious home amenity. In Bergen County, though, a barrel or cabin is not patio furniture. It is a structure on a pad, with power or a flue, sitting through freeze–thaw winters on often-tight suburban lots.
This guide is how to install an outdoor sauna the right way: foundation, utilities, permits, barrel vs. cabin, and what catalog photos leave out. It supports outdoor sauna.
Catalog photo vs. permanent install
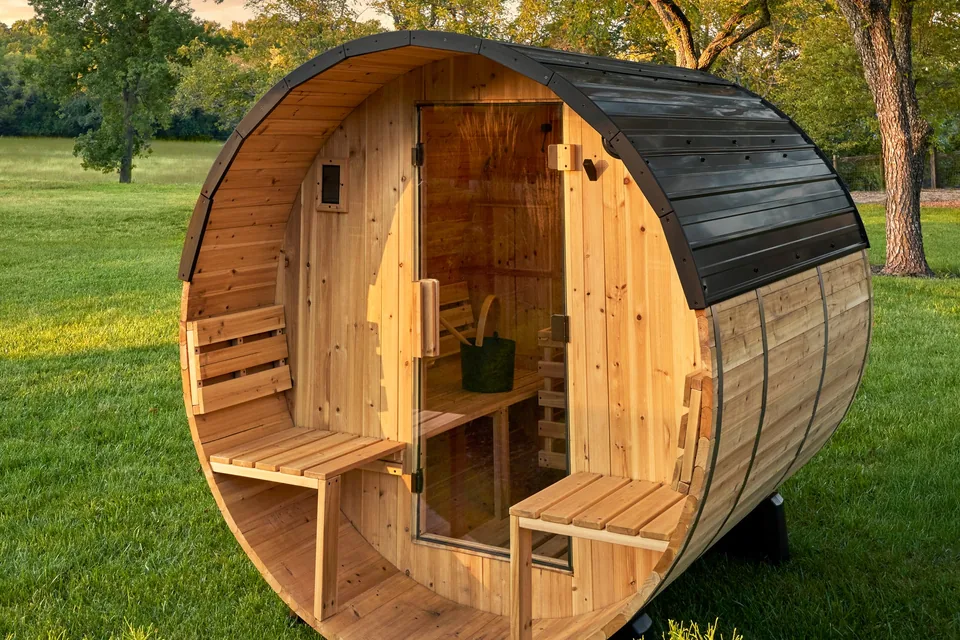
A beautiful barrel on Instagram may be sitting on a temporary base with an extension cord. A permanent outdoor sauna for real use wants:
- A level, draining pad or footings sized for the weight
- Heater clearances to benches and walls per the listing
- Electric: dedicated hardwired circuit (often 240V class) by a licensed electrician
or wood-fired: code-compliant flue and clearances to combustibles - Ventilation (intake low near heater, exhaust high)
- Weatherproofing of the shell and, if near the house, smart placement for privacy and drainage
Myth: “A tent heater is the same as a sauna.” Follow manufacturer clearances and Authority Having Jurisdiction (AHJ — your local building department) rules. Myth: “HOA does not apply in backyards.” Often it does — check first.
Barrel vs. cabin
Barrel saunas — iconic shape, efficient heat, smaller footprint, kit-friendly. Still need a proper base and utilities. Good for many Bergen backyards where space is limited.
Cabin saunas — more room to stand and design benches, can feel more architectural, often more site work and cost. Can read as a small accessory structure.
Neither is “better” in the abstract. Match volume to heater sizing and the yard’s real access for materials.
Site and climate (Bergen-specific realities)
Freeze–thaw and poor drainage wreck pads. Choose a location that:
- Drains away from the house foundation
- Has access for concrete or modular pad work
- Meets municipal setback/accessory-structure expectations for the address — do not invent setback feet
- Considers neighbors’ privacy and noise
- Works in wooded yards (Mahwah, Ridgewood, parts of Paramus) where leaf litter and shade affect roof and maintenance
Do not place a heavy unit on soft, unlevel ground and hope for winter.
Utilities before the unboxing party
Electric heaters need a proper circuit — not a forever extension cord. Ampacity and wire size follow the heater listing and electrical code; licensed trade territory. Wood-fired units need flue design and clearances. Plan trenches and panel capacity before the kit arrives so materials are not stranded in the driveway.
Permits and HOA
Permanent outdoor saunas (pad/cabin) commonly need a building and/or zoning accessory-structure path. Electric work usually needs an electrical permit path. Confirm AHJ for the job address. HOA architectural rules may apply even when the town is quiet. Approvals before ordering beat stop-work after delivery.
Cost and timeline (site-specific)
Outdoor saunas typically land mid four figures and up once pad, electrical, and unit are included; custom cabins and complex sites climb. Timeline: days to weeks for straightforward kits with pad and power; longer when permits, custom builds, or difficult access apply. Planning weeks for HOA/permits are real.
Process snapshot
- Site selection and feasibility (zoning/HOA/utilities)
- Pad/footings
- Permits as required
- Assemble kit or frame cabin; weatherproof
- Electrical or flue rough-in
- Interior insulation/foil as designed; benches with clearances
- Heater, ventilation, door, commission, inspection
Red flags
- Extension-cord “temporary” that becomes permanent
- No pad design for frost and drainage
- Heater clearances ignored for extra bench space
- Ordered kit before HOA/permit check
- Cheapest pad for a heavy cabin
Heat, wood, and winter care
Cedar and other sauna woods weather. Plan for UV, snow load on roofs, and leaf debris in wooded Bergen yards. Keep intakes and vents clear. Follow manufacturer guidance for heater stones, element care, and wood finishing. A neglected exterior stains and warps faster than interior benches.
Neighbors and privacy
Place doors and windows for your privacy and theirs. Exhaust steam and occasional wood smoke (if wood-fired) are social facts on tight lots. Good placement prevents conflicts better than apologies after install.
Insurance and permanence
Ask your insurer how a permanent accessory structure and hardwired heater are treated. Permanent improvements are not the same as movable furniture for coverage conversations.
Barrel assembly quality and weather
Kits vary. Look for tight stave fit, quality banding, door seals, and roof details that shed Bergen rain and snow. Assemble on a true plane; out-of-level barrels stress bands and doors. After the first season, re-check fasteners and wood movement.
If the unit sits near trees, plan roof cleaning and a path that does not become a mud track in spring thaws. A beautiful sauna with a destroyed lawn approach will not get used.
Closing note for homeowners
Settle the site and the electrical path before you order anything. Where the sauna sits decides the trench run, the pad work, and whether setback rules come into play — and an HOA, where you have one, gets asked before the crate ships, not after. Think about winter, too: the whole point is using it in January, so plan the path you’ll actually shovel.
Confirm permit requirements with your town’s construction office for the job address. Keep the heater manual and the electrical inspection paperwork with your house file — both matter for warranty service and resale.