
There is real pleasure in a house that finally looks crisp again — courses that run true, trim that frames the windows cleanly, elevations that shed water the way they should through a Northeast winter. In Bergen County, siding is not only curb appeal. It is the visible layer over a drainage plane that has to survive freeze–thaw, wind, and UV on mid-century walls that were often finished in a mix of materials.
This guide focuses on vinyl and fiber cement: when to repair, when to re-side, what has to happen behind the panels, and how to keep a split-level looking intentional rather than patched. It supports siding repair and replacement.
What Bergen exteriors are working with
A lot of 1950s–1970s stock — split-levels and colonials in Paramus, Dumont, Teaneck, Ridgewood, and similar towns — wears mixed cladding: brick or stone accents on the lower, siding above; aluminum upgrades from past decades; vinyl over older sheathing; fiber cement on newer refreshes. Matching a single elevation is easy. Matching a whole house after years of fade and partial repairs is the craft challenge.
Freeze–thaw cycles stress flashings, sealants, and transitions. Dark colors and sun exposure fade vinyl faster on some elevations. Leafy lots load gutters and splash zones at the base of walls — clearance and grade still matter under new siding.
Vinyl vs. fiber cement (honest trade-offs)
Vinyl
Lightweight, cost-effective, and expandable — when installed for movement. Vinyl is a rain screen, not the waterproofing. The weather-resistant barrier (house wrap) and flashing behind it manage water. Nail loosely in the center of slots, leave expansion gaps at channels, and start from a dead-level starter strip. Overdriven nails and tight channels buckle panels when summer heat arrives.
Full-home vinyl typically lands mid four to five figures depending on elevations and trim; partial elevations can be lower. Install windows are usually days to a couple of weeks weather-permitting.
Fiber cement
Heavier, more impact- and fire-resistant in many product lines, holds paint well, and can look closer to traditional clapboard. Installation is more labor- and skill-heavy; substrate must be sound. Great for elevations that take abuse or for owners who want a painted look with longer paint cycles than wood. Cost and labor usually sit above vinyl for comparable square footage.
Neither material forgives bad flashing. The craft is in the layers you never see.
Vinyl vs fiber cement — what real homeowners say after 3–5 years
Day-one curb appeal is easy. Year three to five is when ownership habits and Northeast weather tell the truth. Patterns below are generalized homeowner feedback, not a warranty chart and not invented case studies.
| After 3–5 years | Vinyl | Fiber cement |
|---|---|---|
| Fade / color | Sun-facing elevations (south/west) often show the first fade, especially darker factory colors. Partial re-sides ordered years apart are hard to match. Owners who batch-ordered whole elevations report cleaner long-term looks. | Painted fiber cement can hold a crisp look longer between paint cycles than wood; factory-primed/painted systems still need eventual recoats. Color is a paint plan, not a permanent factory skin forever. |
| Impact | Lawn equipment, bikes, hail, and baseballs leave dents and cracks more readily on thinner profiles. Backyard and driveway elevations take the hits. Attic spare panels become gold. | Generally tougher against dents and sports-equipment hits in many product lines — owners often cite fewer “dented by the mower” stories. Heavy impact can still crack boards; repair is a board-level craft job. |
| Maintenance | Low day-to-day: gentle wash, clear gutters, watch for loose corners after wind. No paint cycle if you keep factory color — until UV forces a full elevation rethink. | Higher than vinyl for paint: inspect and recoat on a real cycle. Less “set and forget,” more “paint holds the look.” Still less fussy than natural wood for many households. |
| Movement / install tells | Buckles and oil-canning show up when nails were tight or channels starved of expansion room — often blamed on “bad vinyl” when install was the culprit. | Weight and fastening demand sound substrate; bad walls show as wavy courses or fastener issues, not summer heat buckle in the same way as vinyl. |
| What owners wish they knew | Order attic stock and accept that vinyl is a cladding over WRB, not armor. Dark colors and high-UV walls need honest expectations. | Budget labor and painting into the 5-year story, not only day-one board cost. Pair with solid flashing so the “premium skin” is not over a soft wall. |
Craft-proud summary: vinyl wins for budget and low paint maintenance when install respects movement. Fiber cement wins for painted durability and impact tolerance when the wall and paint plan are part of the project. Both lose when flashing and WRB were skipped to save a day.
Repair vs. re-side an elevation vs. whole house
Spot repair when damage is local and product still matches.
Elevation re-side when one face is UV-cooked or storm-damaged.
Whole house when fade mismatch, widespread failure, or a full exterior refresh is
the goal — batch-order colors so courses match.
Myth: “Thicker vinyl is automatically better.” Install, accessories, expansion, and WRB matter more. Myth: “Siding is the waterproofing.” It is not.
What has to happen before the first panel
- Repair sheathing and straighten wavy walls
- Install or correct the weather-resistant barrier
- Flash windows, doors, and penetrations
- Set corners, channels, and a level starter
- Then hang cladding for expansion and flatness
Skipping wrap or flashing to “save time” is how new siding still hosts leaks.
Split-levels and mixed materials
Horizontal lines and low-pitch roofs are part of the Bergen split-level look. Updates should respect those lines — not create a random patchwork of brands and exposures. Where brick or stone remains on the lower, new upper cladding should be chosen for proportion and color relationship, not only price per square.
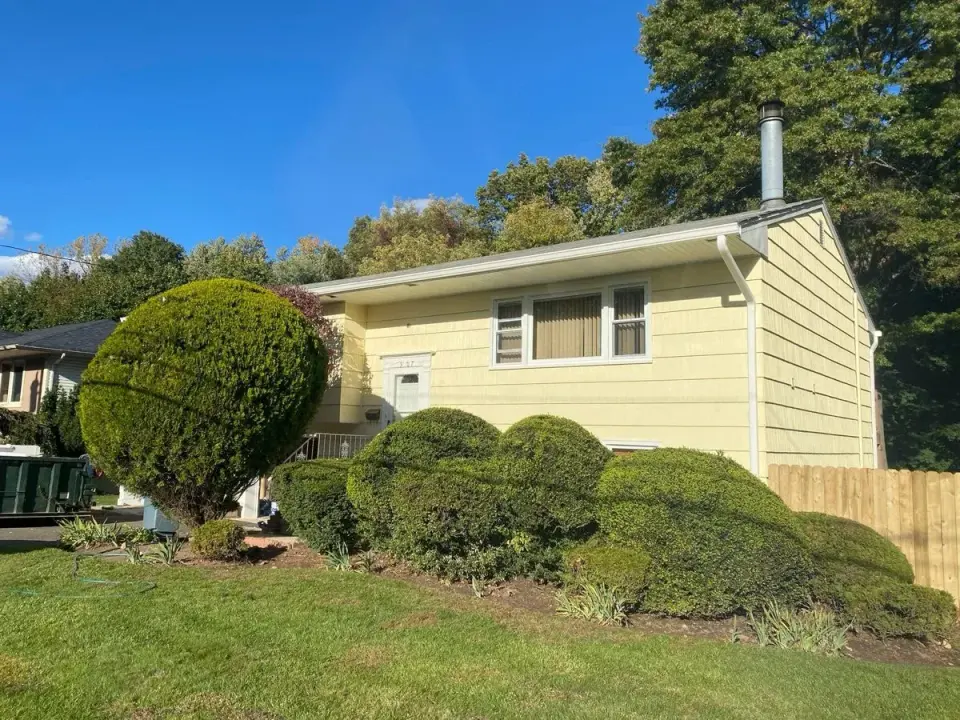
Matching upper siding to brick or lower cladding (practical advice)
Most Bergen split-levels keep masonry or stone on the lower band and siding above. The re-side job fails aesthetically when the upper is ordered in isolation.
Color and value
- Pull samples against the real brick in daylight — showroom fluorescent light lies
- Match value (light/dark relationship) more than a perfect hue clone; brick is multi-toned; siding is flatter
- Warm brick often fights cool gray vinyl; test two candidates on the actual wall
- If you repaint fiber cement, mock a board next to brick and mortar color before the whole elevation is committed
Proportion and exposure
- Keep course lines and trim widths that echo the horizontal split — do not make the upper look like a different house stacked on top
- Deep shadow lines and heavy trim can overwhelm a short upper band; lighter exposures often read cleaner on compact split-levels
- Align window surrounds and corner posts so verticals do not fight the brick cap or water table line
Transitions (where leaks and ugly joints hide)
- Detail the siding-to-brick joint with proper flashing/kickout thinking where roofs or walls meet masonry — caulk alone is not a drainage plan
- Keep base of upper cladding off splash; soil and mulch piled against siding or brick is a moisture problem with a new face
- When lower is stone veneer or painted block, confirm attachment planes and drip edges so water leaves the wall instead of sitting in the joint
Material pairing that tends to look intentional
| Lower | Upper that often works | Watch-out |
|---|---|---|
| Red / brown brick | Warm off-whites, soft grays, muted greens; fiber cement or vinyl with classic exposure | Stark pure white can glare next to dark brick; test first |
| Light / painted brick | Deeper siding body color or crisp white with strong trim | Too-close color match can look muddy |
| Stone accent | Simpler siding field; let stone be the texture hero | Busy stone + high-contrast variegated siding fights for attention |
| Full re-side, no masonry | One primary cladding + consistent trim package | Mixed leftover brands from past decades read as patchwork |
Batch-order color for all elevations in the same campaign when possible. A “we will do the street face this year and the back next year” plan is how fade mismatch becomes a second project.
Cost and season
Partial elevations: a typical package sits around low–mid thousands. Full vinyl homes: a typical package sits around mid four to five figures. Fiber cement packages usually run higher with labor. Weather windows matter — shoulder seasons are popular for exterior work. Substrate repairs discovered after tear-off move both cost and schedule.
Permits — confirm the town
For many 1–2 family homes, simple repair/replacement of existing siding can track ordinary-maintenance patterns under state UCC language — but towns vary, and some products or scopes leave that path. Opening changes, structural sheathing work, or dimension changes are different stories. Confirm Authority Having Jurisdiction (AHJ — your local building department) for the job address. Do not invent a countywide always/never rule.
Red flags
- Panels over rotten sheathing with no WRB conversation
- Nails driven tight “so it never moves”
- No flashing detail at windows
- Color ordered elevation-by-elevation over years with no match plan
- Lowest bid that is only panels, no accessories or prep
Trim, soffit, and the finished look
Panels alone do not make a facade. Corner posts, window surrounds, soffit, fascia, and transitions to brick or stone decide whether the house looks renewed or unfinished. Budget accessories and labor for those details. Dark colors on vinyl may carry product limits — confirm manufacturer guidance before ordering a whole elevation in a deep tone.
On freeze-thaw cycles, keep base clearances out of splash and grade soil away from cladding. New siding over a mulch volcano against the wall is still a moisture problem.
Maintenance after install
Wash gently, clear gutters, and inspect sealants at penetrations seasonally. Damaged panels from storms should be replaced from leftover stock when possible — order a small attic spare for future repairs.
Storm damage: impact, wind, and insurance prep
Hail, wind-driven debris, and backyard impact leave different patterns than simple UV fade. Fiber cement and certain insulated products handle impact differently than thin vinyl — match material to exposure on street-facing and driveway elevations if one wall takes all the hits.
After storms, check corners, gable peaks, under-eave returns, and starter courses where wind lifts panels. Soft sheathing behind a cracked panel is a wall problem, not only a skin problem. Fast, correct replacement from attic stock beats mismatched emergency panels on the street face.
What to document before calling insurance
Insurers and adjusters work from evidence. Capture this before temporary tarps hide conditions and before debris is fully cleared — without putting yourself at risk on ladders in wind.
- Date, time, and storm type — note the event (hail, high wind, fallen limb) and when you first saw damage
- Elevation photos — each wall from ground level: wide shots plus close-ups of cracks, missing panels, dented vinyl, lifted corners, damaged soffit/fascia
- Context shots — street view of the house, neighboring debris if relevant, and anything that shows the storm’s path (do not trespass)
- Interior clues — new stains at ceilings or window heads that appeared after the event (water intrusion may lag)
- Product info — leftover panel labels, prior invoices, color names, approximate install year if known
- Inventory list — count damaged panels, corners, and trim pieces by elevation
- Temporary protection — photos of tarps or boards you install, and receipts for emergency materials
- Written timeline — short note of who you called and when (contractor, insurance)
Do not start a full cosmetic re-side “while we are at it” on the claim without clarity on what is storm-related vs elective upgrade. Scope creep is how claims get messy. A contractor walk-through can separate storm damage repair from optional elevation refresh so both you and the adjuster see the same line.
File claims per your policy rules and deadlines; this checklist is documentation craft, not legal advice.
Energy and comfort side benefits
While siding is not primarily insulation, insulated vinyl panels and continuous exterior improvements can change comfort. Pair re-siding conversations with attic air sealing and window flashing upgrades when the walls are open. A coordinated envelope works better than a pretty skin over leaky corners.
Northeast winters punish weak details at rakes, eaves, and wall-to-roof intersections. Specify those details in the contract language.