
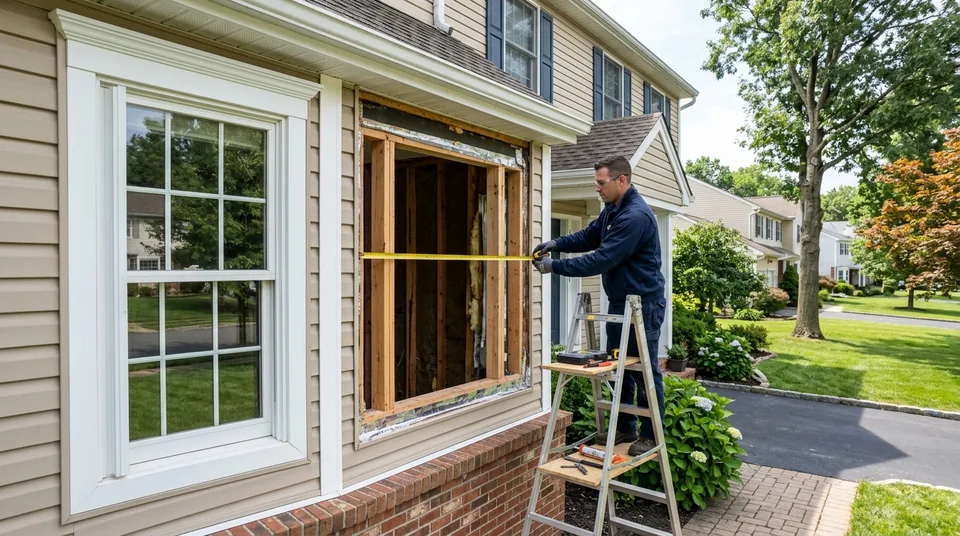
New glass is the photo. How the opening is prepared, flashed, and air-sealed is the job. In Bergen County — where 1950s–1970s split-levels and colonials take freeze–thaw, wind-driven rain, and decades of mixed prior replacements — a beautiful unit in a poorly managed rough opening is still a leak waiting on the next nor’easter.
This is the neighborly walk-through of what good window and door replacement actually includes: insert vs full-frame, sill pans, shingle-style flashing into the weather-resistive barrier (WRB), foam that doesn’t bow the frame, a day-of sequence you can follow without a construction degree, and a detailed prep checklist (what to move, pets/kids, and how long rooms are offline for 4–8 windows vs whole-house). Service hub: windows and doors. For the “should I replace for bills?” decision, see the companion on drafty windows and when replacement pays off.
Why the opening beats the brochure
Windows and doors interrupt the wall’s drainage plane. Water that gets behind siding or brick veneer has to be directed out — not trapped by a bead of caulk that looked fine on install day.
Two myths to retire early:
- “Caulk fixes every window leak.” Failed pan flashing or WRB integration needs opening work. Sealant is a finish detail, not the primary waterproofing plan.
- “Any foam is fine.” High-expansion foam can bow frames and stress operation. Use low-expansion products made for windows and doors.
Manufacturer instructions and ASTM-style flashing practice exist for a reason: warranty and performance both live there. A careful crew works to those directions, not to “how we always did it in the ’90s.”
Insert (pocket) vs full-frame — choose from the wood, not the sales sheet
Insert / pocket sets a new unit inside a sound existing frame. Less exterior disruption, often keeps interior trim, usually faster when frames and sills are solid and reasonably square.
Full-frame removes the old frame to the rough opening. Use it when sills or frames are rotted, when the opening is racked beyond honest shimming, or when you’re changing size. Sliding an insert over soft wood is a future leak with new glass — and a hard conversation with the next owner.
A good measure visit names insert vs full-frame per opening. One label for the whole house is a red flag when half the sills fail a screwdriver test.
Doors are not “windows with a handle”
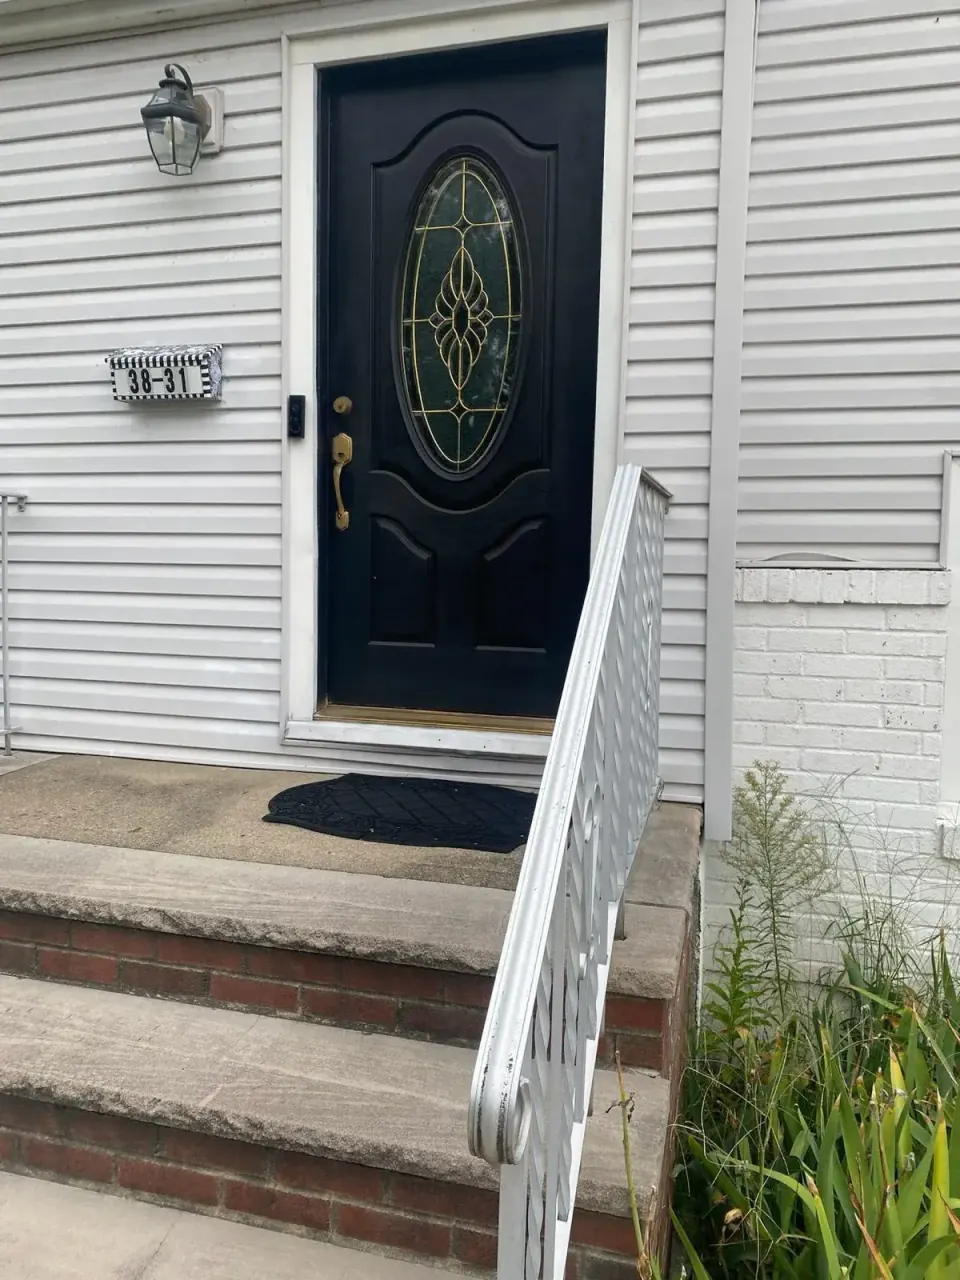
Exterior doors need the same respect for water — and a few extras:
- A sill pan that slopes and back-dams so water sheds to the exterior, not into the floor system or under the threshold.
- Plumb, level, and square before fastening so locks engage, weatherstripping compresses evenly, and the door doesn’t bind after the first humid week.
- Head flashing / drip integrated with cladding so water at the top of the unit leaves the wall, not the header.
- Hardware and security (deadbolt, strike reinforcement) set after the unit is true — not forced into a twisted jamb.
Mid-century entries in towns like Teaneck, Paramus, Dumont, and Ridgewood often sit on worn sills. Inspect wood and thresholds carefully before anyone promises a “slab-only” swap.
Garage doors and openers are a cousin topic: replacing a door in the same opening can be ordinary maintenance under state patterns, while a new hardwired opener circuit often needs an electrical path. Confirm with the Authority Having Jurisdiction (AHJ) for the job address.
The install sequence that separates careful work from “in and out”
Here’s what a proper replacement day (or multi-day package) should feel like:
- Measure twice, order once — width, height, depth, out-of-square notes, egress needs in bedrooms, tempered glass where code requires (baths, doors, hazardous locations).
- Protect floors and finishes; stage units so you’re not dragging frames across finished rooms.
- Remove old units carefully; for full-frame, open to the rough opening without wrecking sound WRB you can reuse.
- Inspect for rot, insects, and prior “mystery foam.” Repair framing before the new unit hides it.
- Sill pan / sill flashing first, lapped so water drains out over the WRB or cladding drainage path — not into the stud bay.
- Dry-fit, then set the unit; shim plumb, level, and square; confirm reveal and operation before you bury anything.
- Fasten per manufacturer — not random screw patterns that miss structural members or overdrive flanges.
- Flash jambs and head shingle-style (each course sheds over the one below); integrate with house wrap or other WRB. Head flashing matters in wind-driven rain.
- Air-seal the perimeter with low-expansion foam or appropriate seal; don’t confuse air seal with “fill until the frame bows.”
- Interior and exterior trim, exterior sealant at the right joints, weeps left clear, locks and sweeps checked.
- Final walk-through: operate every sash and door, check for light at weatherstrip, confirm interior/exterior clean-up.
If a crew skips pan flashing, can’t explain how water leaves the head, or reaches for high-expansion foam as default, you’re not buying installation — you’re buying a future callback.
Bergen stock and climate: why details show up by March
Post-war stock across the county mixes original wood windows, older aluminum, vinyl inserts from prior decades, and partial upgrades that never matched grids. Freeze–thaw cycles work sealants and flashings hard. Wind-driven rain finds weak head details and mulled assemblies that were never treated as a system.
Practical implications:
- Matching grid patterns and exterior trim keeps a colonial or split-level facade coherent — especially on the street elevation.
- Prior inserts may have left you with reduced glass area and hidden sill rot; full-frame is sometimes the only honest reset.
- Bedroom egress: replacement must not shrink net clear opening below what is required. Same-opening ordinary-maintenance paths assume you don’t reduce required clear opening.
- Energy labels (U-factor, SHGC) matter for comfort; they don’t excuse a wet rough opening.
Permits without the scare tactics
Under New Jersey ordinary maintenance patterns (N.J.A.C. 5:23-2.7 and related DCA summaries), replacement of windows and doors in the same opening without altering dimensions or framing is often allowed without a construction permit application. Glass type must still meet code (including safety glazing where required). Emergency-escape openings must not lose required clear opening.
Not ordinary maintenance: new openings, enlarged or reduced openings, header/framing changes. Those follow a building-permit path.
Town FAQs and plan review still vary. Confirm the construction office for your job address. Ordinary maintenance is not permission to install a leaking window — flashing and product compliance still matter when no permit is pulled.
Day-of homeowner prep and what to expect (detailed checklist)
Good installs feel calmer when the house is ready and you know what to move, how long a room is offline, and whether you’re living through a 4–8 window package or a whole-house week. This is logistics, not a scare list — neighbor-level detail so install day doesn’t surprise you.
What to move (and what can stay)
Do this the night before or the morning of for every room on the schedule.
| Item | Action | Why |
|---|---|---|
| Blinds, shades, curtains, rods | Take down on work openings (or agree in writing that the crew bags and labels them) | Crew needs clear access; hardware gets damaged if left half-attached |
| Sill clutter | Clear plants, frames, candles, chargers, soundbars, window AC brackets if removable | First things knocked when the old unit comes out |
| Furniture within ~3 feet of the opening | Pull beds, dressers, sofas, desks back; leave a work lane | Room to set the new unit, foam, and trim without dragging pieces mid-job |
| Breakables on nearby shelves / hutches | Box or relocate to another room | Vibration and traffic; better safe than a cracked vase story |
| TVs / monitors on window walls | Unplug and move if they’re on the work wall or in the path | Cords and mounts conflict with ladders and unit carry-in |
| Area rugs in the work lane | Roll and move | Floor protection goes down clean; rugs trip people carrying glass |
| Wall art next to the casing | Remove or tape a note if it stays | Hammer vibration and trim work |
| Kid toys / pet beds in the work room | Out of the room entirely | Safety and speed |
| Alarm sensors / contacts on the sash | Tell the crew; plan reattachment or a short alarm bypass with your vendor | Windows with security contacts need a handoff so the system doesn’t false-alarm all day |
Can usually stay: large furniture on the far wall of a big room, closet contents, and rooms not on that day’s list — as long as the carry path doesn’t cut through them. When in doubt, clear the path, not the whole house.
Access path (Bergen reality): from driveway or street staging to each work room, keep a continuous clear lane. One-car drives, shared driveways, and tight side yards common in denser towns mean units often come through the front door — not the backyard. Don’t leave bikes, strollers, or Amazon boxes in that lane.
Pet plans (non-negotiable)
Open openings and propped exterior doors are not pet-safe. Plan before 7 a.m., not after the first unit is out.
- Dogs: crate in a closed interior room off the work elevation, or day-board / stay with a neighbor. Even calm dogs bolt when a cold draft hits an open hole. Bathroom breaks on leash only, through a door the crew isn’t using as a materials path.
- Cats: closed room with litter, water, and food; post a note on the door. Cats hide in open walls and truck cabs — yes, really.
- Small animals / birds: move cages out of work rooms (noise and dust).
- Dog doors / pet flaps on work walls: offline for the day; don’t assume the crew knows your pet’s exit route.
- End of day: walk the house before anyone leaves — count animals before openings are celebrated as “done.”
Kid plans
- Bedrooms on the schedule: treat that room as offline for most of that work block (see times below). Make a temporary sleep/homework base in a finished room.
- Toddlers: one adult “gatekeeper” beats hoping they’ll stay curious but careful. Baby gates at hallways help; open stairs + material staging do not mix.
- School-from-home / sick days: pick a retreat room with no openings on that day’s list, snacks staged, and headphones if noise is an issue.
- Play equipment outside: move bikes and toys off the elevation where ladders or staging will sit.
- Night one after a multi-day job: kids can usually sleep in finished bedrooms; don’t put them in a room still on tomorrow’s list if trim is incomplete and tools are staged there.
How long rooms are out of service
Think in blocks, not minutes. A careful crew finishes and weathers-in as they go, but the room still feels like a jobsite while they’re in it.
| Situation | Typical room “out of service” feel | What you can still do |
|---|---|---|
| Single window in a bedroom | ~1–3 hours active work in that room (insert often shorter; full-frame longer) | Use the rest of the house; don’t enter the work zone without asking |
| Two windows in the same room | Half day is a fair expectation | Same — stay clear until the crew releases the room |
| Living/dining with a picture + flanks | Most of a day for that space | Kitchen/other wing if not on the list |
| Kitchen window over sink | 2–4+ hours; sink may be awkward | Plan meals that don’t need that counter; dish duty pauses |
| Entry door in the package | Half day class event for the front hall | Use a secondary exit; don’t schedule deliveries to that door |
| Room finished, curing caulk/paint | Usable carefully same day; heavy curtain rehang may wait | Light use OK; ask before loading new blinds on fresh caulk |
Overnight rule you should insist on: every opening is weather-tight and secure before the crew leaves. You sleep in the house; you should not sleep next to a plywood “we’ll finish tomorrow” hole unless that temporary close-in was agreed and done properly.
HVAC may short-cycle when several openings are open on a cold or hot day — annoying, not an emergency. Don’t “help” by cranking the thermostat to compensate in a way that freezes pipes in a closed-off wing; keep occupied areas reasonable and ask the lead if a zone should be set back.
4–8 windows vs whole-house: typical disruption
Order/fabrication can take weeks before anyone arrives. The table below is on-site living disruption only.
4–8 windows (most common first package) — about 1–2 days on site
| What to expect | Detail |
|---|---|
| Duration | Often one long day for insert-heavy 4–6 units; two days if full-frame, upper floors, or doors are mixed in |
| How rooms go offline | In sequence, not all at once — e.g. three bedrooms morning, living wall afternoon |
| Where you live | Rest of the house stays normal; one “messy” zone at a time |
| Noise / dust | Moderate; power tools in bursts; floor protection in active rooms |
| Parking / yard | Van + material staging one day or two; scaffold only if upper work needs it |
| Pets / kids | Manageable with a closed safe room and a clear path plan |
| WFH | Doable if your office isn’t on the day’s elevation; take calls mid-day in a quiet corner or the car |
| End state each night | Weather-tight; debris bagged; you can cook and sleep normally |
| Best homeowner move | Ask for a written room order the day before (which rooms, morning vs afternoon) |
Sample 4–8 day flow
- Arrive, protect floors, stage units for day-one rooms only.
- Loop: remove → inspect → pan/flash → set → air-seal → trim.
- Release each room when it’s operable and weather-tight.
- End-of-day walk-through on finished openings; confirm tomorrow’s list.
- Day two (if needed): remaining openings, punch, final clean of paths.
Whole-house package — about several days to 1–2 weeks on site (weather-permitting)
| What to expect | Detail |
|---|---|
| Duration | Count, full-frame share, stories, and weather drive this more than marketing calendars |
| How rooms go offline | Most rooms get a turn; some days are elevation-focused (whole street wall), not room-random |
| Where you live | Pick one clean retreat room (and maybe one bath) that stays off the schedule as long as possible |
| Noise / dust | Higher cumulative load; even with good protection the house feels “in progress” mid-week |
| Parking / yard | Multi-day staging; possible scaffold or lifts overnight on one elevation — lock gates, secure pets |
| Pets / kids | Strongly consider daycare/boarding for peak days; rotating closed rooms gets exhausting |
| WFH | Harder — plan office days elsewhere or cluster deep-work on exterior-only afternoons |
| Meals | Kitchen window days need a simple meal plan; some families do one takeout night mid-project without shame |
| End state each night | Still weather-tight openings; paths may stay protected with ram board for the next morning |
| Best homeowner move | Weekly-style plan: which elevation which day; secondary exit if the entry door is in the package; buffer day for rain |
Insert-heavy whole-house moves faster and leaves more interior casing in place. Full-frame-heavy means more exterior work, more trim, and more chance that rot discovery adds a half-day — that’s not drama, it’s the opening telling the truth.
Weather pauses are normal in Bergen shoulder seasons. A good schedule has buffer. A bad one promises “entire house by Friday” with no rain plan.
Morning-of quick list (print this)
- [ ] Pets secured in a non-work room (or already off-site)
- [ ] Kids know the “red room” they can’t enter
- [ ] Blinds/curtains down; sills clear; furniture pulled
- [ ] Path clear from truck to work rooms
- [ ] Gates unlocked; parking spot held
- [ ] Alarm/security contacts noted for the lead
- [ ] Trim decision confirmed (keep vs replace)
- [ ] Soft sills / prior leaks pointed out in person
- [ ] Secondary exit plan if the entry door is on today’s list
- [ ] Your phone number for the lead taped to a visible spot
What to leave to the crew
- Cutting into the WRB and re-flashing
- Structural repairs at rotted sills and jack studs
- Upper-floor full-frame work and ladder/scaffold decisions
- Final call on insert vs full-frame once the opening is open (measure visit sets the plan; discovery can still change it)
DIY storm panels on a sound frame can be reasonable. DIY full-frame on an occupied wall with unknown WRB is how water ends up in the dining-room ceiling.
After they leave (same week)
- Operate every sash and lock; note binding while it’s fresh.
- Rehang blinds only when the lead says caulk/paint is ready.
- Reconnect alarm sensors or call your alarm vendor.
- Keep labels and warranty packets in the house file.
- After the first hard rain or freeze, walk the heads and sills; call punch-list items while the job is still warm in everyone’s mind.
How this ties to siding, paint, and bigger envelope work
If you’re re-siding or doing a full exterior paint cycle, sequence windows and doors with that work. Flashing legs and trim details are cleaner when cladding is open or when painters aren’t trapping wet details. See also siding repair and replacement when cladding is part of the same season.
If only a few openings are failing, prioritize them — but order colors and grids so later phases can still match. Patchwork facades read as three projects, not one house.
Cost and timeline (so process meets budget)
Single window or door units commonly run hundreds to low thousands installed. Multi-opening packages often land mid four to five figures, driven by count, full-frame share, custom sizes, access, and rot discovery. A few units: hours to days. Whole-house: several days to 1–2 weeks, weather-permitting. Measure and lead time usually dominate the schedule more than the final fastening day.
Ask every bid for: insert vs full-frame map, flashing/pan approach, foam type, trim inclusions, and how change orders work if rot appears.
Red flags on install day
- No sill pan or “we caulk the threshold” on exterior doors
- Head left unflashed or flashing taped upside-down relative to water flow
- High-expansion foam as standard
- Fastening before the unit is plumb/level/square
- Weep holes buried in caulk
- No operation check before the truck leaves
- Pressure to accept “it’s fine, it’ll settle” on a binding sash